Console Overview
The Console is the main screen you use day-to-day in Depfloy. It is where you find your servers, open a project, kick off deployments, and watch what is happening. This page is a quick tour so you know where everything lives.
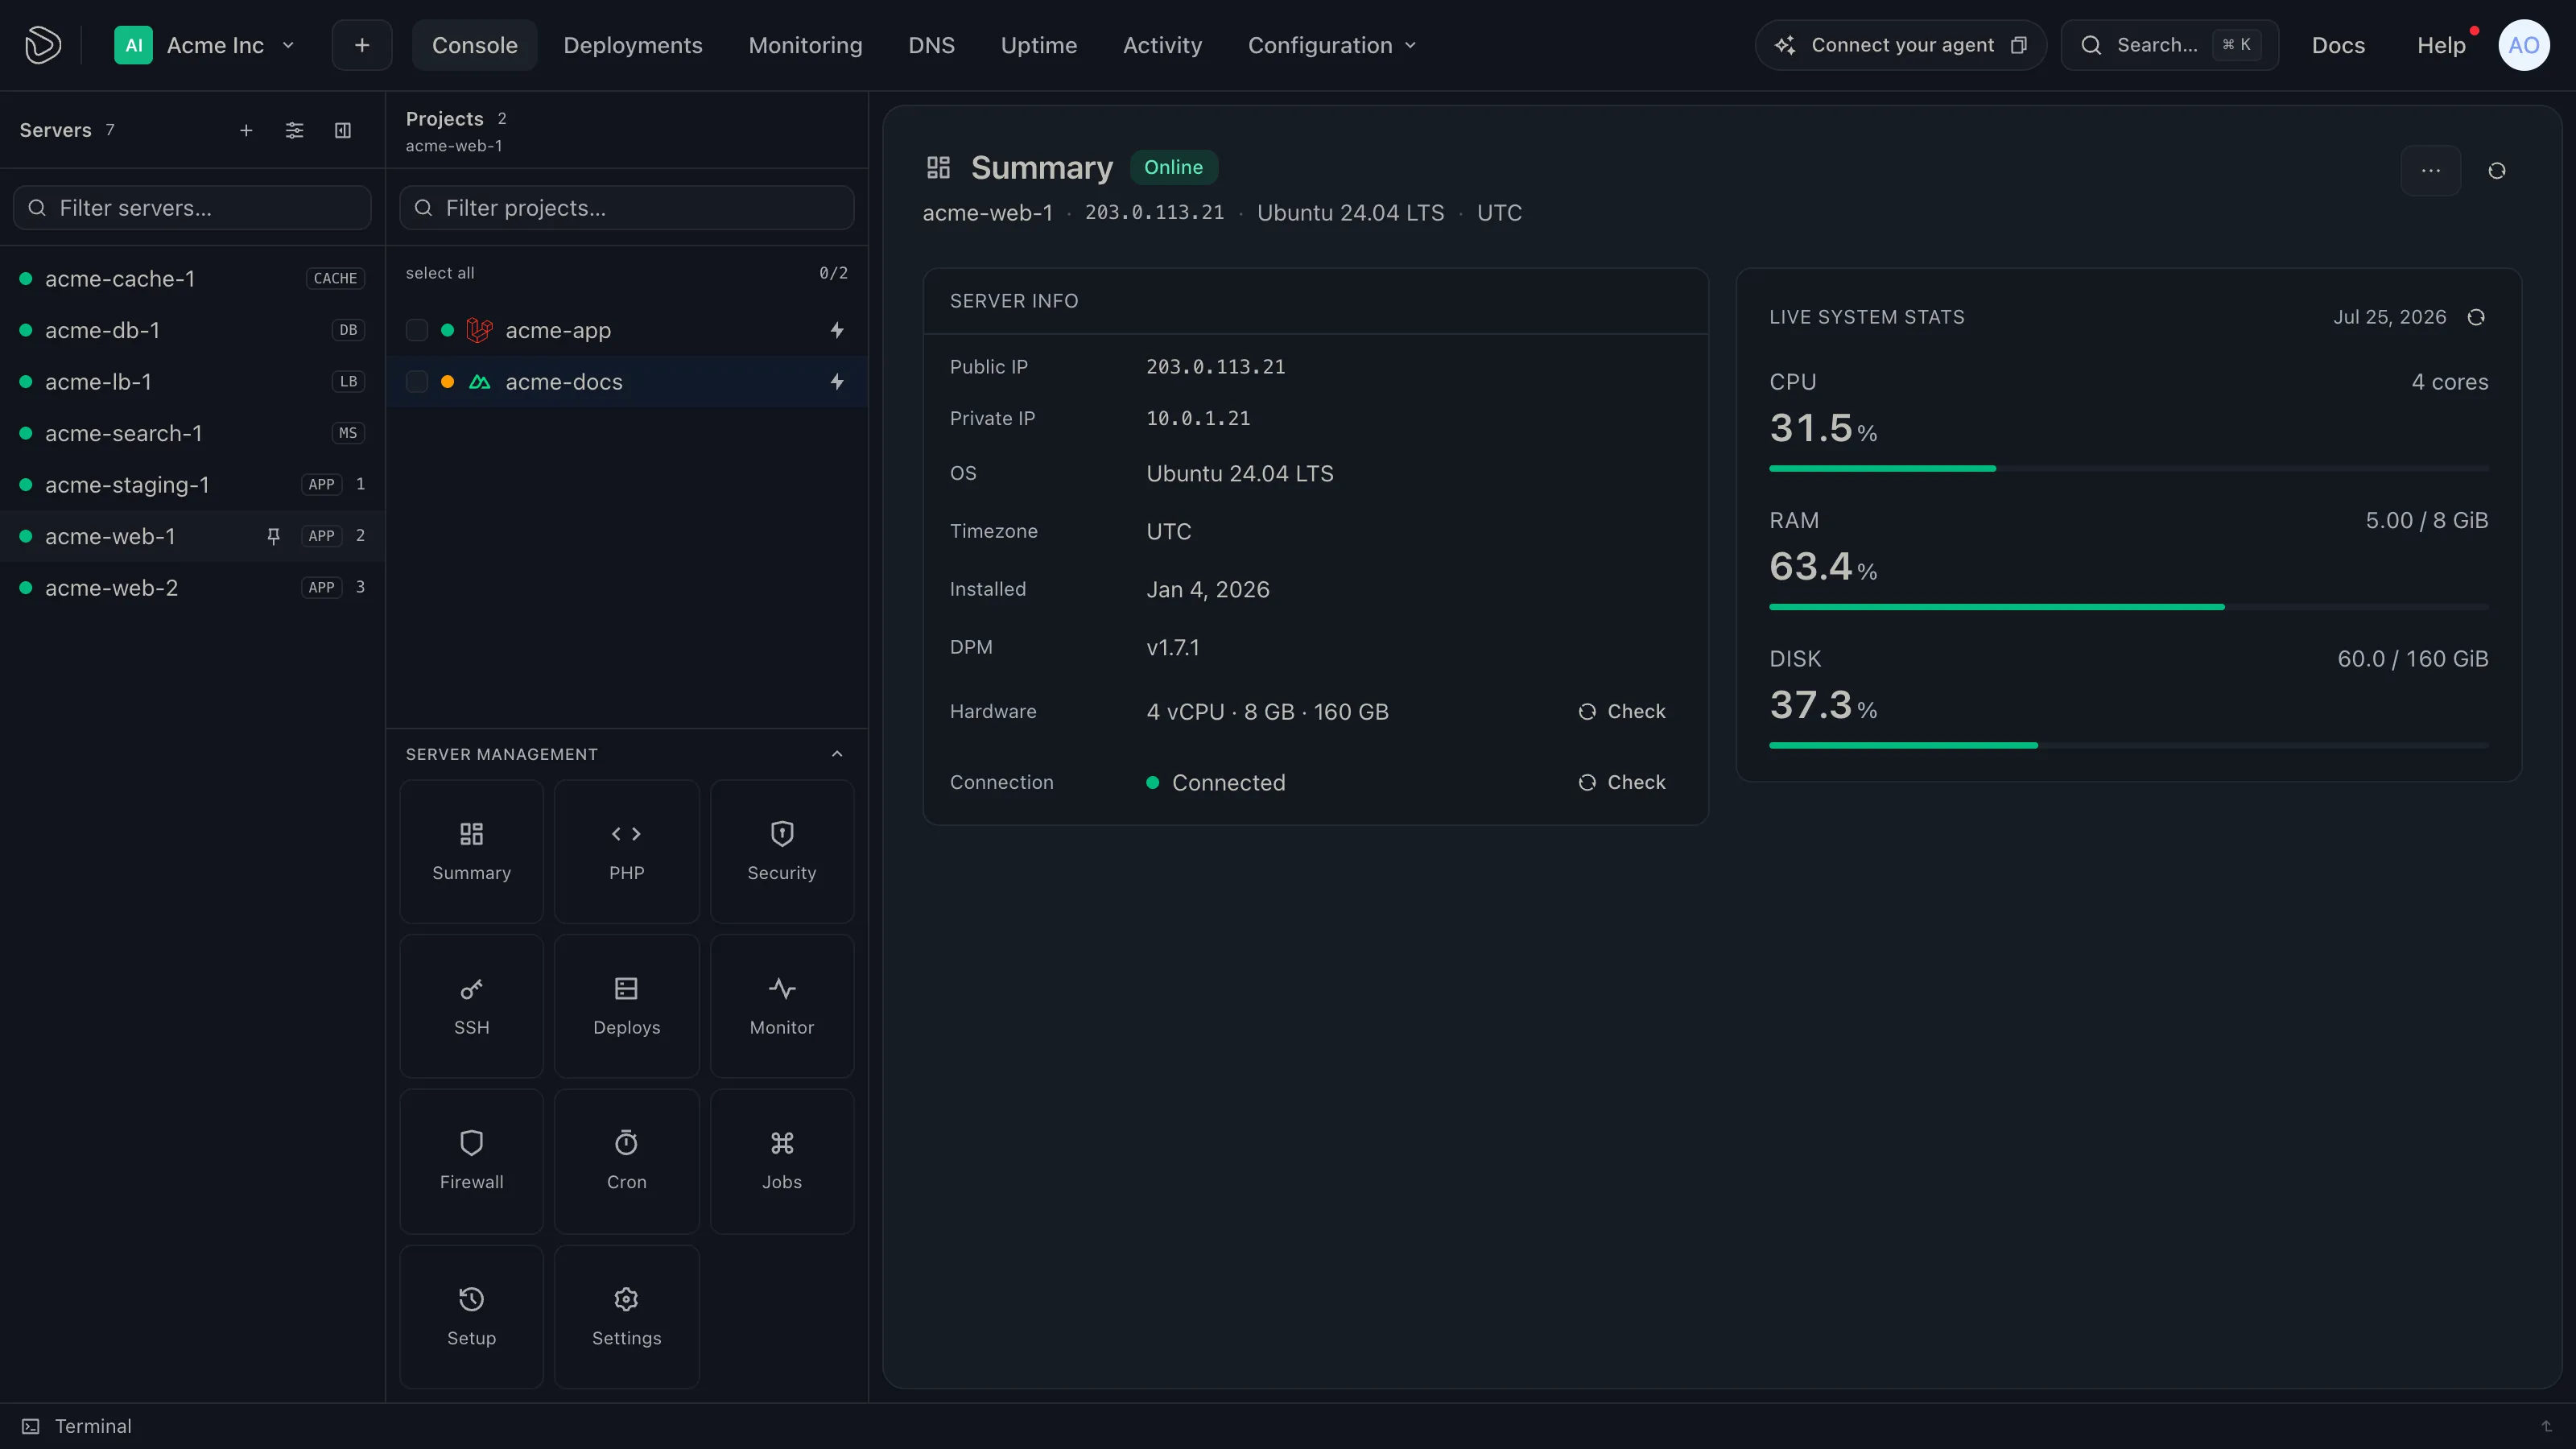
The layout #
The Console has two parts:
- Left sidebar — your starting point, in two columns. The Servers header shows the server count and its create, grouping, and collapse actions. After you select a server, the Projects header shows the project count with the server name on a second line. Other server types use the same header pattern for databases, cache users, search, and load-balancer pools.
- Main panel — the working area. When you click a server or a project in the sidebar, this is where its screens open.
The Terminal bar opens along the bottom of the Console for an interactive shell on a server or project. See Terminal Sessions.
The top bar #
Above the main panel, four tabs let you switch what you are looking at:
- Console — the default view: sidebar plus working area
- Deployments — a global list of every deployment across your servers, with filters and search
- Activity — a timeline of recent events (deployments, server alerts, member actions)
- Configuration — a dropdown of account- and organization-level settings: Server Providers and Maintenance Template (Owners and Admins only), plus API Tokens, Integrations, MCP, Source Control, Backup Destinations, and SSH Keys (each visible if your role has the matching permission).
Your personal settings — profile, notifications, billing — live behind the avatar dropdown in the top-right.
The landing screen #
With no server or project selected, the main panel shows the state of the organization, including a Latest Deployments list.
The project name in each row opens that project as a tab, with the same semantics as the sidebar: a plain click previews it, ⌘/Ctrl-click keeps it, and a project already open is only focused. A row whose project has since been deleted stays in the list as a record of the deployment, but is not clickable.
Switching organizations #
If you belong to more than one organization, the organization switcher sits at the top of the sidebar. Switching organizations changes everything in the sidebar — servers, projects, members — to the chosen organization’s content. See Organizations for how organizations work and how to manage them.
Working with a server #
Click a server in the sidebar and the main panel opens that server’s management view. From here you can switch between several screens — Summary, Settings, Security, SSH Keys, PHP, Database, Cache, Meilisearch, Concurrent Deploys, Monitoring, Firewall, Scheduled Jobs, Background Jobs, Load Balancer. Which screens appear depends on the server type and your permissions.
For a full reference of each screen, see Server Sections.
Restart actions #
The “More” menu in the server header gives you one-click restarts:
- Restart Server — reboots the entire machine
- Service restarts — restart only a specific service. Only the services actually installed on the server appear in the menu (Redis / Valkey, PostgreSQL, MySQL, Clickhouse, Meilisearch).
You will see a confirm dialog before anything restarts.
Working with a project #
Projects open as tabs, in a strip above the main panel.
- One click on a project in the sidebar opens it as a preview tab. Click a different project and it takes the preview tab’s place, so browsing does not leave a trail of tabs behind you.
- Double-click, or ⌘/Ctrl-click, keeps the tab. A double-click on the tab itself does the same thing.
- A project that is already open is only focused — an open tab is never demoted back to a preview.
Switching between open tabs does not reload the page. An environment value you were half-way through typing, where you had scrolled to, and which sub-tab you were on are all still there when you come back.
Hover a tab and the tooltip gives the project name with its server — the way to tell apart two projects with the same name on different servers. A preview tab’s tooltip says so, and adds that a double-click keeps it. The first time a preview tab is replaced, a one-line note under the strip explains the rule; dismiss it and it does not come back. That dismissal is saved to your account, so it holds on every device.
When there are more tabs than fit, names shorten (api-wor…) rather than disappearing, and the strip scrolls sideways past that point.
Your open tabs are stored in the browser, per organization — they survive a refresh, but they are per-device. The same account on a laptop and a desktop has its own set on each.
Inside a project, its own tabs run across the top:
- Summary — current state, last deployment, quick links
- Domains — custom domains and SSL
- Environments — environment variables
- Commands — run shell commands inside the project
- Schedulers — Laravel scheduled commands
- Background Jobs — Laravel plugins (Octane, Reverb, Horizon, Nightwatch) and your own background workers
- Logs — nginx and application logs
- Nginx Configuration — nginx template and custom snippets
- Project Settings — Git repository, deploy triggers, maintenance mode
Each tab loads on demand. Once you have opened a tab, switching back to it within a few minutes shows the same data without re-fetching. Use the Reload (⟳) button in the tab header to force a refresh.
Sidebar — grouping and pinning #
Use the Group by menu at the top of the sidebar to organize your servers:
- None — the default, a flat list
- Environment — Production / Staging / Dev / Untagged
- Server type — Application / Database / Cache / Meilisearch / Load Balancer
You can also pin the servers you visit most. Pinned servers show in their own group at the top of the sidebar regardless of grouping. Pins are personal — your pins do not change the sidebar for your teammates.
Both your grouping choice and your pins follow you across browsers and devices.
Narrowing the Servers column #
The Servers column collapses to a 52-pixel rail. Each server becomes a tile carrying a short form of its name and the same health dot it has in the full column; hovering a tile shows the whole name.
The rail comes on by itself below 1200 pixels of window width. The button in the column’s heading collapses it at any width, and the button on the rail opens it again — a choice you make by hand is remembered and overrides the automatic rule, on this and every other device you sign in from.
There is no filter box or grouping on the rail. The search button there opens the ⌘K search window instead, and both come back when you open the column. The name of the server you are working on stays visible either way: the Projects column beside it is headed with it.
Groups — one application’s environments together #
A group is a name for the environments of one application. Production, staging and a dev copy of the same shop belong to one group; an agency running six clients gets one group per client. The hierarchy is organization → group → project, and a project is one environment of its group.
Grouped projects appear under their group name in the sidebar, with the ones you have not
assigned collected under Ungrouped. A project you have labelled shows its environment as a
badge next to its name — prod, stg or dev.
Both fields are optional, and neither is filled in for you. A project with no group and no label is an ordinary project that shows no badge; nothing counts it as production because you have not said so. You set them on the project’s Settings tab.
Filtering and search #
The Servers and Projects columns each have their own filter below the header. Server search flattens grouped results while you type; clearing it restores your group view. For roles that can run bulk project actions, select all and the selection count sit below the project filter.
Live updates #
Deployments, logs, monitoring alerts, and background-job status all update in place — you do not need to refresh. If Depfloy temporarily cannot reach you with live updates (a corporate proxy, captive portal, or VPN sometimes blocks the connection that delivers them), an amber banner appears at the top of the screen. The page itself keeps working; only the live updates pause until the connection comes back.
If the banner stays, see Developer Guide → “Realtime updates paused” amber banner for what to try next.
Where to go next #
- Initialize Server — bring your first server online
- Create Project — deploy your first application
- Server Sections — full reference for each server screen
- Members — who can do what in the Console